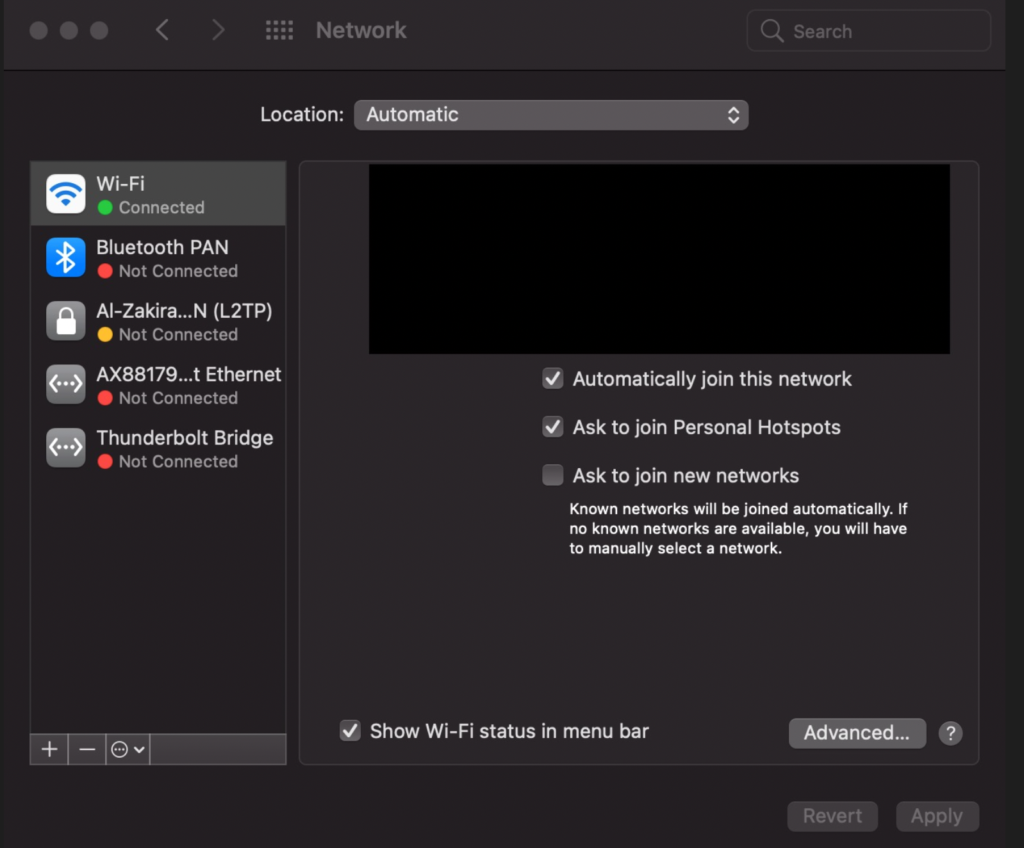
Lately, I was experiencing an issue on my new M1 MacBook Pro where I had the VPN connected and connection was indeed successfully established. However, I wasn’t able to access the shared resources on the network – unable to access a network drive as an example. If you are experiencing the same issue then please keep reading.The Mac comes with L2TP VPN client by default which can be configured on the “Network” pane (System Preferences -> Network). Although, OpenVPN is the best in-terms of perfomance but L2TP is also equally good when it comes to security. The good part about L2TP is that the client comes pre-installed/supported on a Mac.
Network Pan on a Mac
Once you have it configured then you can click on the VPN connection name (you gave) on the left list to select it. Please make sure to check “Show VPN status in menu bar” option as this will display a little icon in the menu bar which could be handy to easily invoke it. Please note that if you have it configured properly then the “Server Address” and the “Account Name” fields would not be empty. I deliberately deleted those entries from the pic for confidentiality reasons.
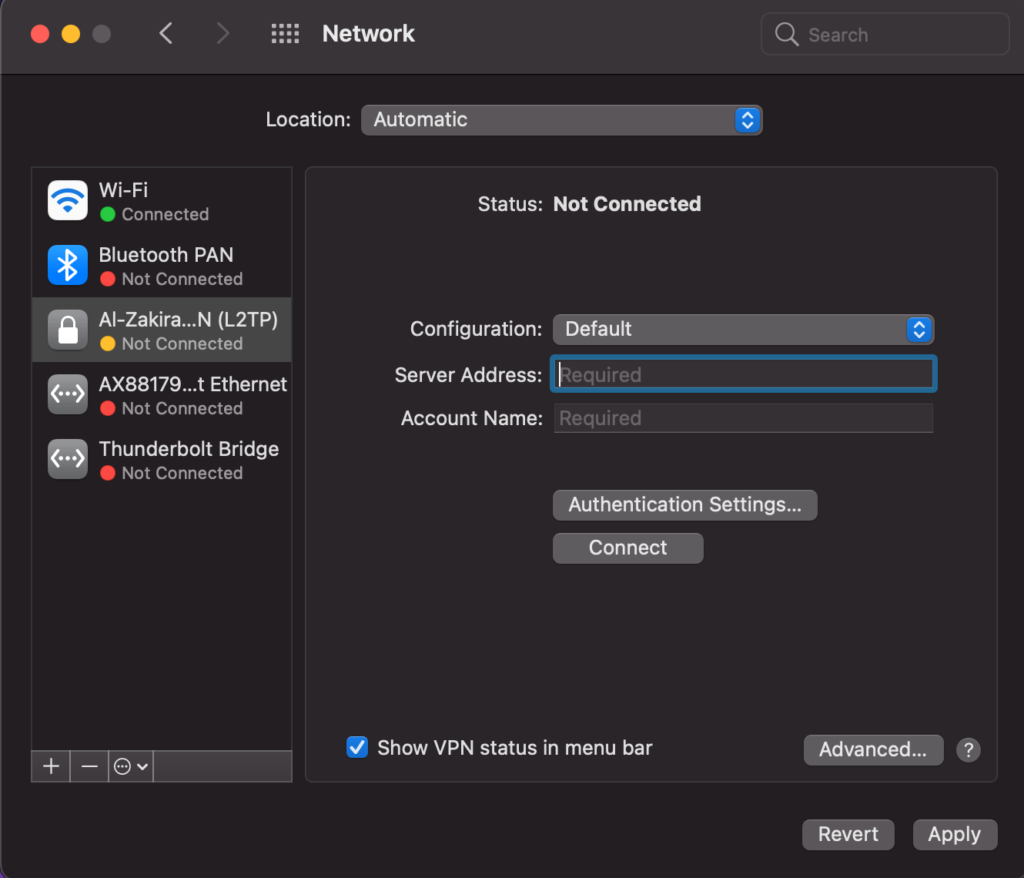
L2TP VPN connection
Now, you should be seeing a rectangular shaped icon in the menu bar. And clicking on it would display the VPN network name which you have just finished configuring. Select the “Connect VPN Name” entry to invoke the connection. This would present another window where you are asked to input the username and password field to establish the connection.
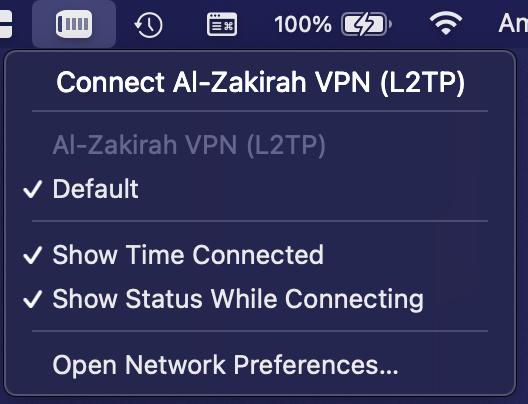
VPN icon on the Menu Bar

L2TP VPN Credentials Window
After having entered the valid credentials and clicking on the “OK” button would result in establishing the connection. The status on the menu bar would now show a timer displaying the time elapsed after establishing the connection. You can also see that clicking that icon now shows an option “Disconnect VPN Name” which can be used to disconnect the VPN. If for any reason you are not able to come this far or not able to establish the connection then repeat the whole process and see if the credentials provided were invalid or VPN client wasn’t configured properly.
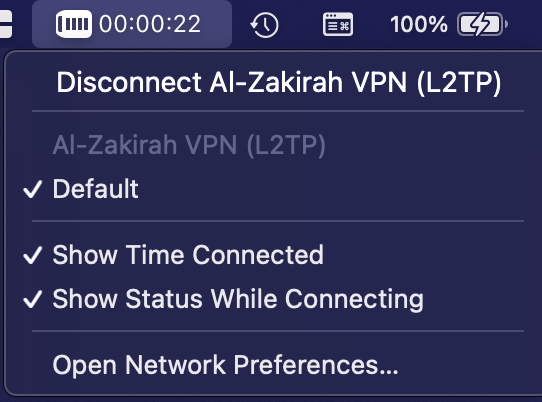
VPN Connected Status in the Menu bar
At this point, we have successfully established the VPN connection. If you have access to the VPN server to which the client is connected to, you could check on the server to check the connection/client list. And indeed it should list the IP address of your MAC as one of the active connections. At this stage, if you have configured your shared resources (like the network share or a drive ..etc) on the server side to be accessible via SMB for example then you should now be able to access that drive post establishing a successful VPN connection from outside your local home network.
If you unable to, then there could many reasons for this access issue. Assuming that you have the VPN configured properly and the network drive or the shared resource is setup properly with proper access privileges, the most likely cause of the issue is that the service order is NOT being set properly on the “Network Pane”. In order to verify that bring back the Network pane again (as shown below). By comparing the status now with the picture before VPN connection was established, you can see that the VPN network is now at the top of the list on the left in the window. This is very critical for it to successfully establish the right service order which’s needed to enable the access to the network shared resources. You could see that in my case it already tops the list and I don’t have issues with accessing the network shared resources right now.
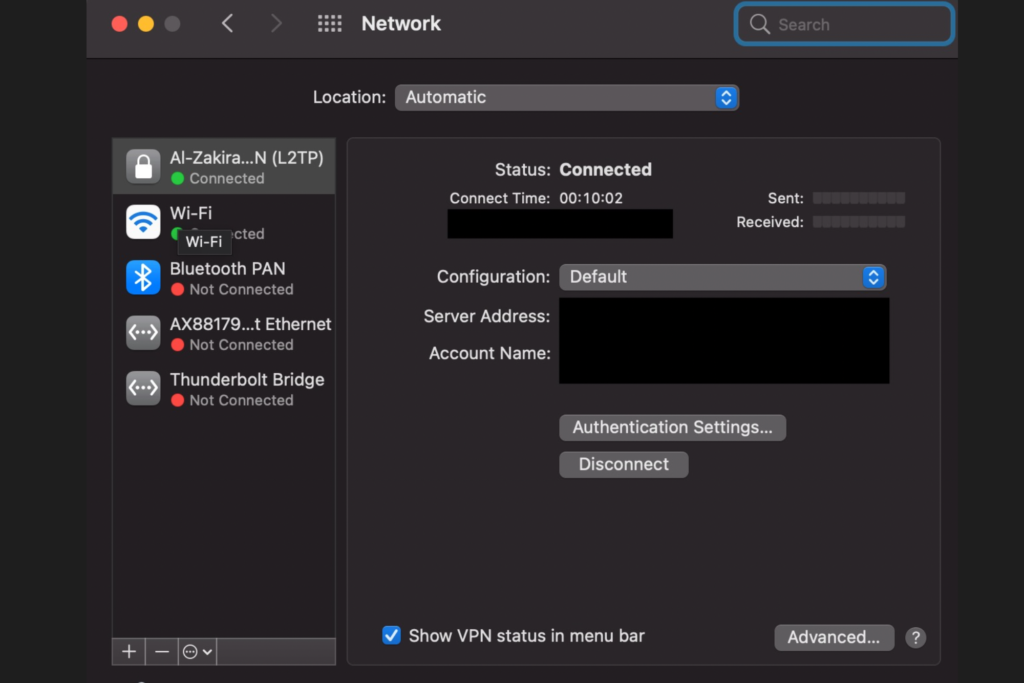
Network Pane with VPN connected
If you are not seeing it topping your list then you need to do the following to fix the order issue:
- Click on the small circle next to the “-” (minus) sign at bottom left of the Network window as showing in the picture below
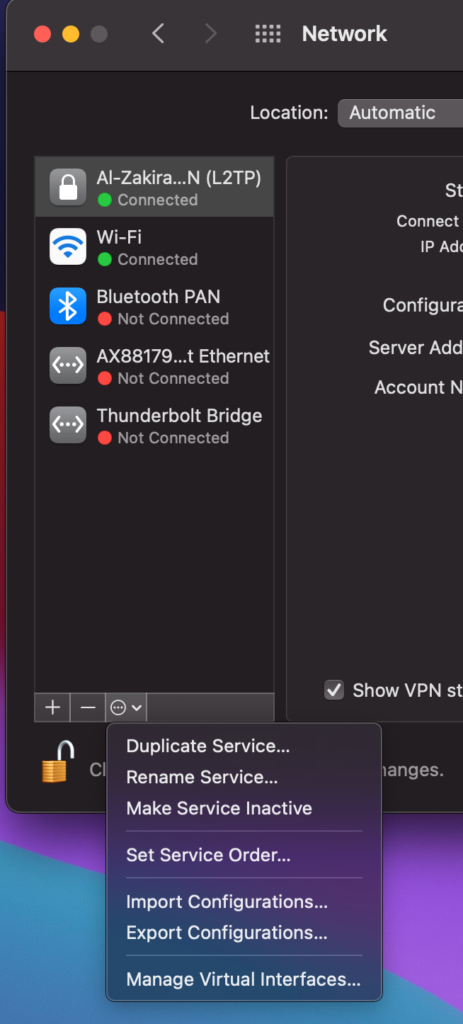
Drop down menu at the bottom left
- Select the option “Set Service Order…” and this will bring you a window where all the entries or the network names would be listed.
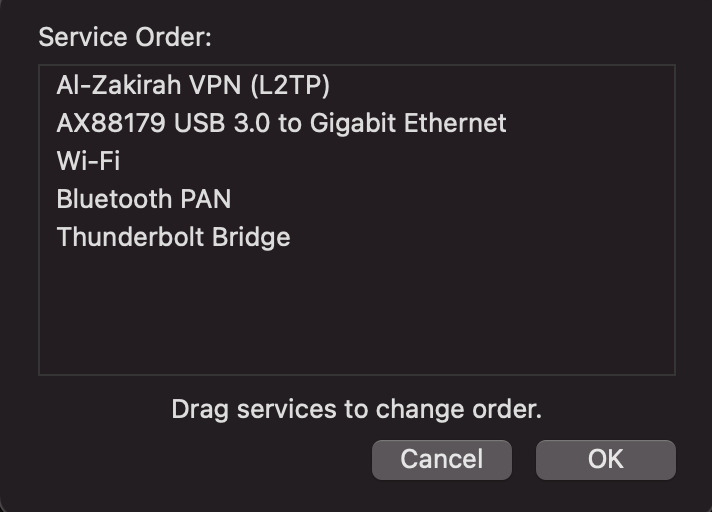
Set Service Order window
- Now you can drag and re-arrange to make sure that the VPN network name is moved to the top of the list and click “OK”
- Make sure to hit the “Apply” button on the “Network” window to apply and save the changes
That’s it, it should resolve the issues and you should now be able to access the shared resources using the VPN connection.
Please feel free to give 👍 if this resolved your issue. And don’t hesitate to Contact Us if you have any questions or need help.